Crown molding
3/7/19

Hi all,
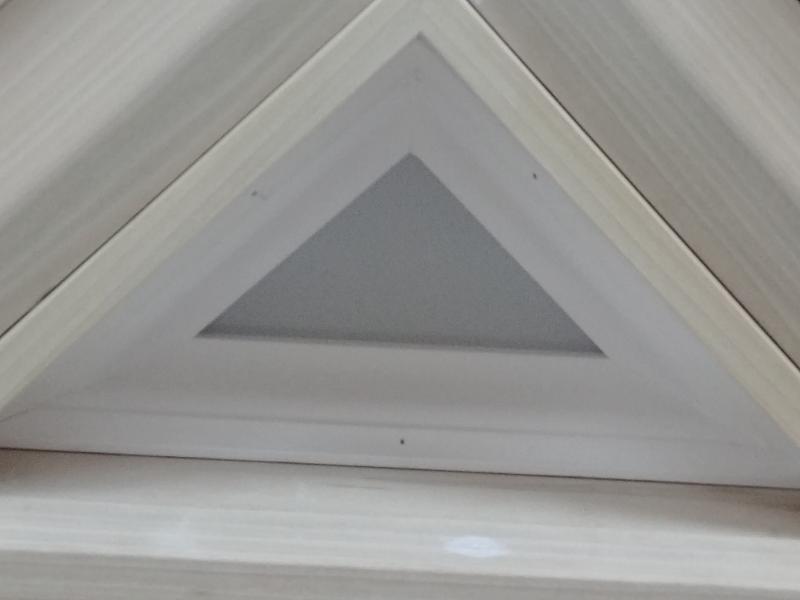
I have a question for the install guys/gals. I have been installing a coffered ceiling and came to a point while putting up my crown where I wasn't sure how to go about a situation, and if the method I used was the best one. In one section of the ceiling, the beams are meeting the wall beam at a 45 degree angle. As a result, I have areas that are triangular with 1 - 90 degree corner, and 2 - 45 degree corners. I always cut my crown flat so what I thought I needed to do was look in my chart, find the 45 degree angle between wall, set my saw and go. What I found is that from 60 - 189 degrees, there was no information on my chart. Then I Google searched and again found nothing either in a chart or calculator. So after finding nothing about it and thinking for a few minutes, I decided that I needed to set up a reversible parallel fence and approach it from that direction. I found that by setting my miter angle to 34.5 and my bevel angle to 47.5, I could get my joints to fit fairly well. Is there a better method to achieve this joint or did I arrive at the best solution? Thank you for your time.
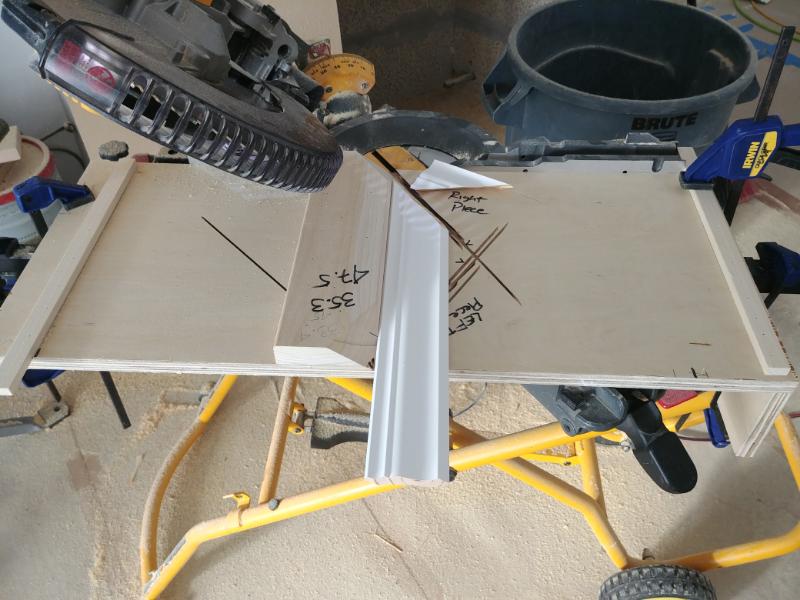
View higher quality, full size image (800 X 600)

View higher quality, full size image (800 X 600)
View higher quality, full size image (800 X 600)
3/7/19 #2: Crown molding ...
NOTE:
I just realized I mis-wrote some of my post. I wasn't able to find any information for wall angle below 60 degrees. I could only find info from 60 - 180.
3/8/19 #3: Crown molding ...
A couple things to try that you might find easier and safer.
1. Try cutting your crown nested instead of flat which, IMO, is safer and faster than having bevel and miter your saw at the same time.
2. Make your jig with a fence so you can cut the crown nested and set the jig at 45 degrees to the saw's fence instead of perpendicular. This way when your saw is at 0 degrees you're actually making a 45 degree cut on your crown. Then when you turn your saw to 22.5 degrees you know you're making a 67.5 degree miter on your crown which is what the miter cut should be if I understand your post correctly.
3/8/19 #4: Crown molding ...
That looks like a 12" Dewalt slider. Why on earth would you cut crown on its back? The primary reason for 12" blades is so you can cut 6" crown leaning against the fence.
It is so much easier & faster when making minor adjustments.
At the end of the day your method works well in that case for a couple of cuts.
3/8/19 #5: Crown molding ...
Steven and Adam make good points. The way you're doing it works, but takes way too long. Spend 15 minutes and make a couple of jigs to hold your crown up so you can make all the cuts with miter angles only, no blade beveling.
After watching inexperienced guys in my shop making multiple trial & error cuts before getting it right (and often ending up with a piece of molding that's too short), I built 3 jigs for the different sizes of crown we normally use. Now, anybody in my shop can make good cuts the first time. And time is money!
3/10/19 #6: Crown molding ...
https://www.dewalt.ca/en-ca/dewalt-dna/featured-articles/how-to-cut-crown-molding
I,ve been to cheap to buy the jig a good installer will learn out to change the bevel one or two degress to get a tight fit in any angle
3/12/19 #7: Crown molding ...
The only time you should be cutting on the flat is when your molding is to large to be cut nested. What happens when you need a 46� miter. You have to look it up, set the saw up, if you can because the miter and bevel angles will be in tenths of a degree. And when you need to cut the opposing miter you need to move the angle and the bevel.
With the nested method you go to 46� left, then 46� right. Takes seconds.
For angles that you are doing with the triangle you need a 90 jig to make it work right. But still keep it nested.
3/18/19 #8: Crown molding ...
I thought this guy had a good idea in making it simple.
Crown Jig
3/27/19 #9: Crown molding ...
We've been using these since 2002. That video is an utter waste of time. Making the jig and cutting with it. There is an order of magnitude of risk of injury with that jig as well.
Most saw companies (Dewalt, Bosch, Makita, Hitachi) all make a similar stop. They all cost around $30. They are good for 6.5" crown on the 12" saws.
Dewalt Crown Stops
3/27/19 #10: Crown molding ...
There is no one in his right mind who would want to cut like that
It looks pretty dangerous
4/5/19 #11: Crown molding ...
That�s just a wacky rig no way any professionals I know would use it. Very dangerous. The best way to describe it is upside down and backwards. Adam is spot on with the crown molding stops; we have used them for over 20 years. Mostly now I do all my cutting with a chop saw set down into a sort of box that extends on both ends. Don�t think much of the dewalt saw rig for cutting crown since so much of it we cope. We clamp all our cuts to cope them and almost all of us like to cut and cope at a much higher level than the Dewalt rig allows for. The Dewalt rig is nice for general cutting but we don�t like them for crown molding. Adam is correct all 12� saws are built that way specifically for this reason. In fact the newer ones have a telescoping arm that moves in two directions to allow for even more room. Another reason is around here getting moldings the exact same size is a jock for stock moldings so using a crown stop will lessen the degree of filling needed in the cope to make it work. If we are wood on wood we miter exactly as you are doing but the crown stops will make it so much nicer and safer for you.
10/13/19 #12: Crown molding ...
Here a photo of 5 piece crown did 3 floor in a 100 year old home .Had to be fast used no jig would have been hard to cope [ would have slowed us down ] there was no straight angles .
I reliazed when answering that you have a unique angle did you come up with solution ?
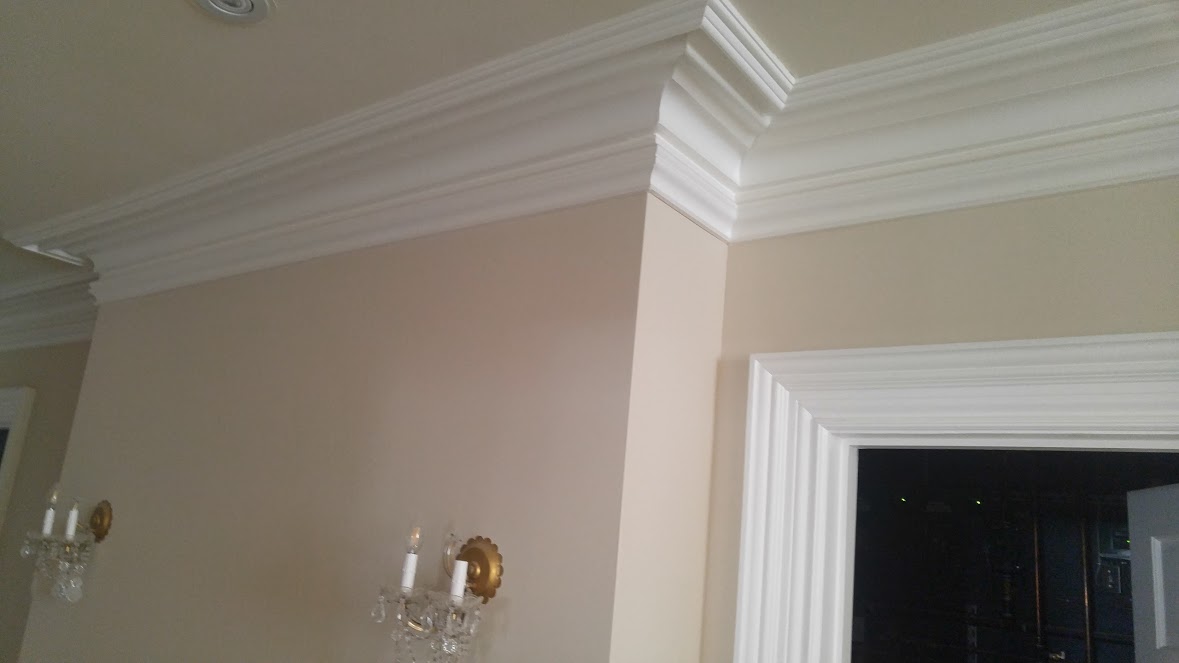
View higher quality, full size image (1179 X 663)
