Message Thread:
Challenging finish
1/27/22

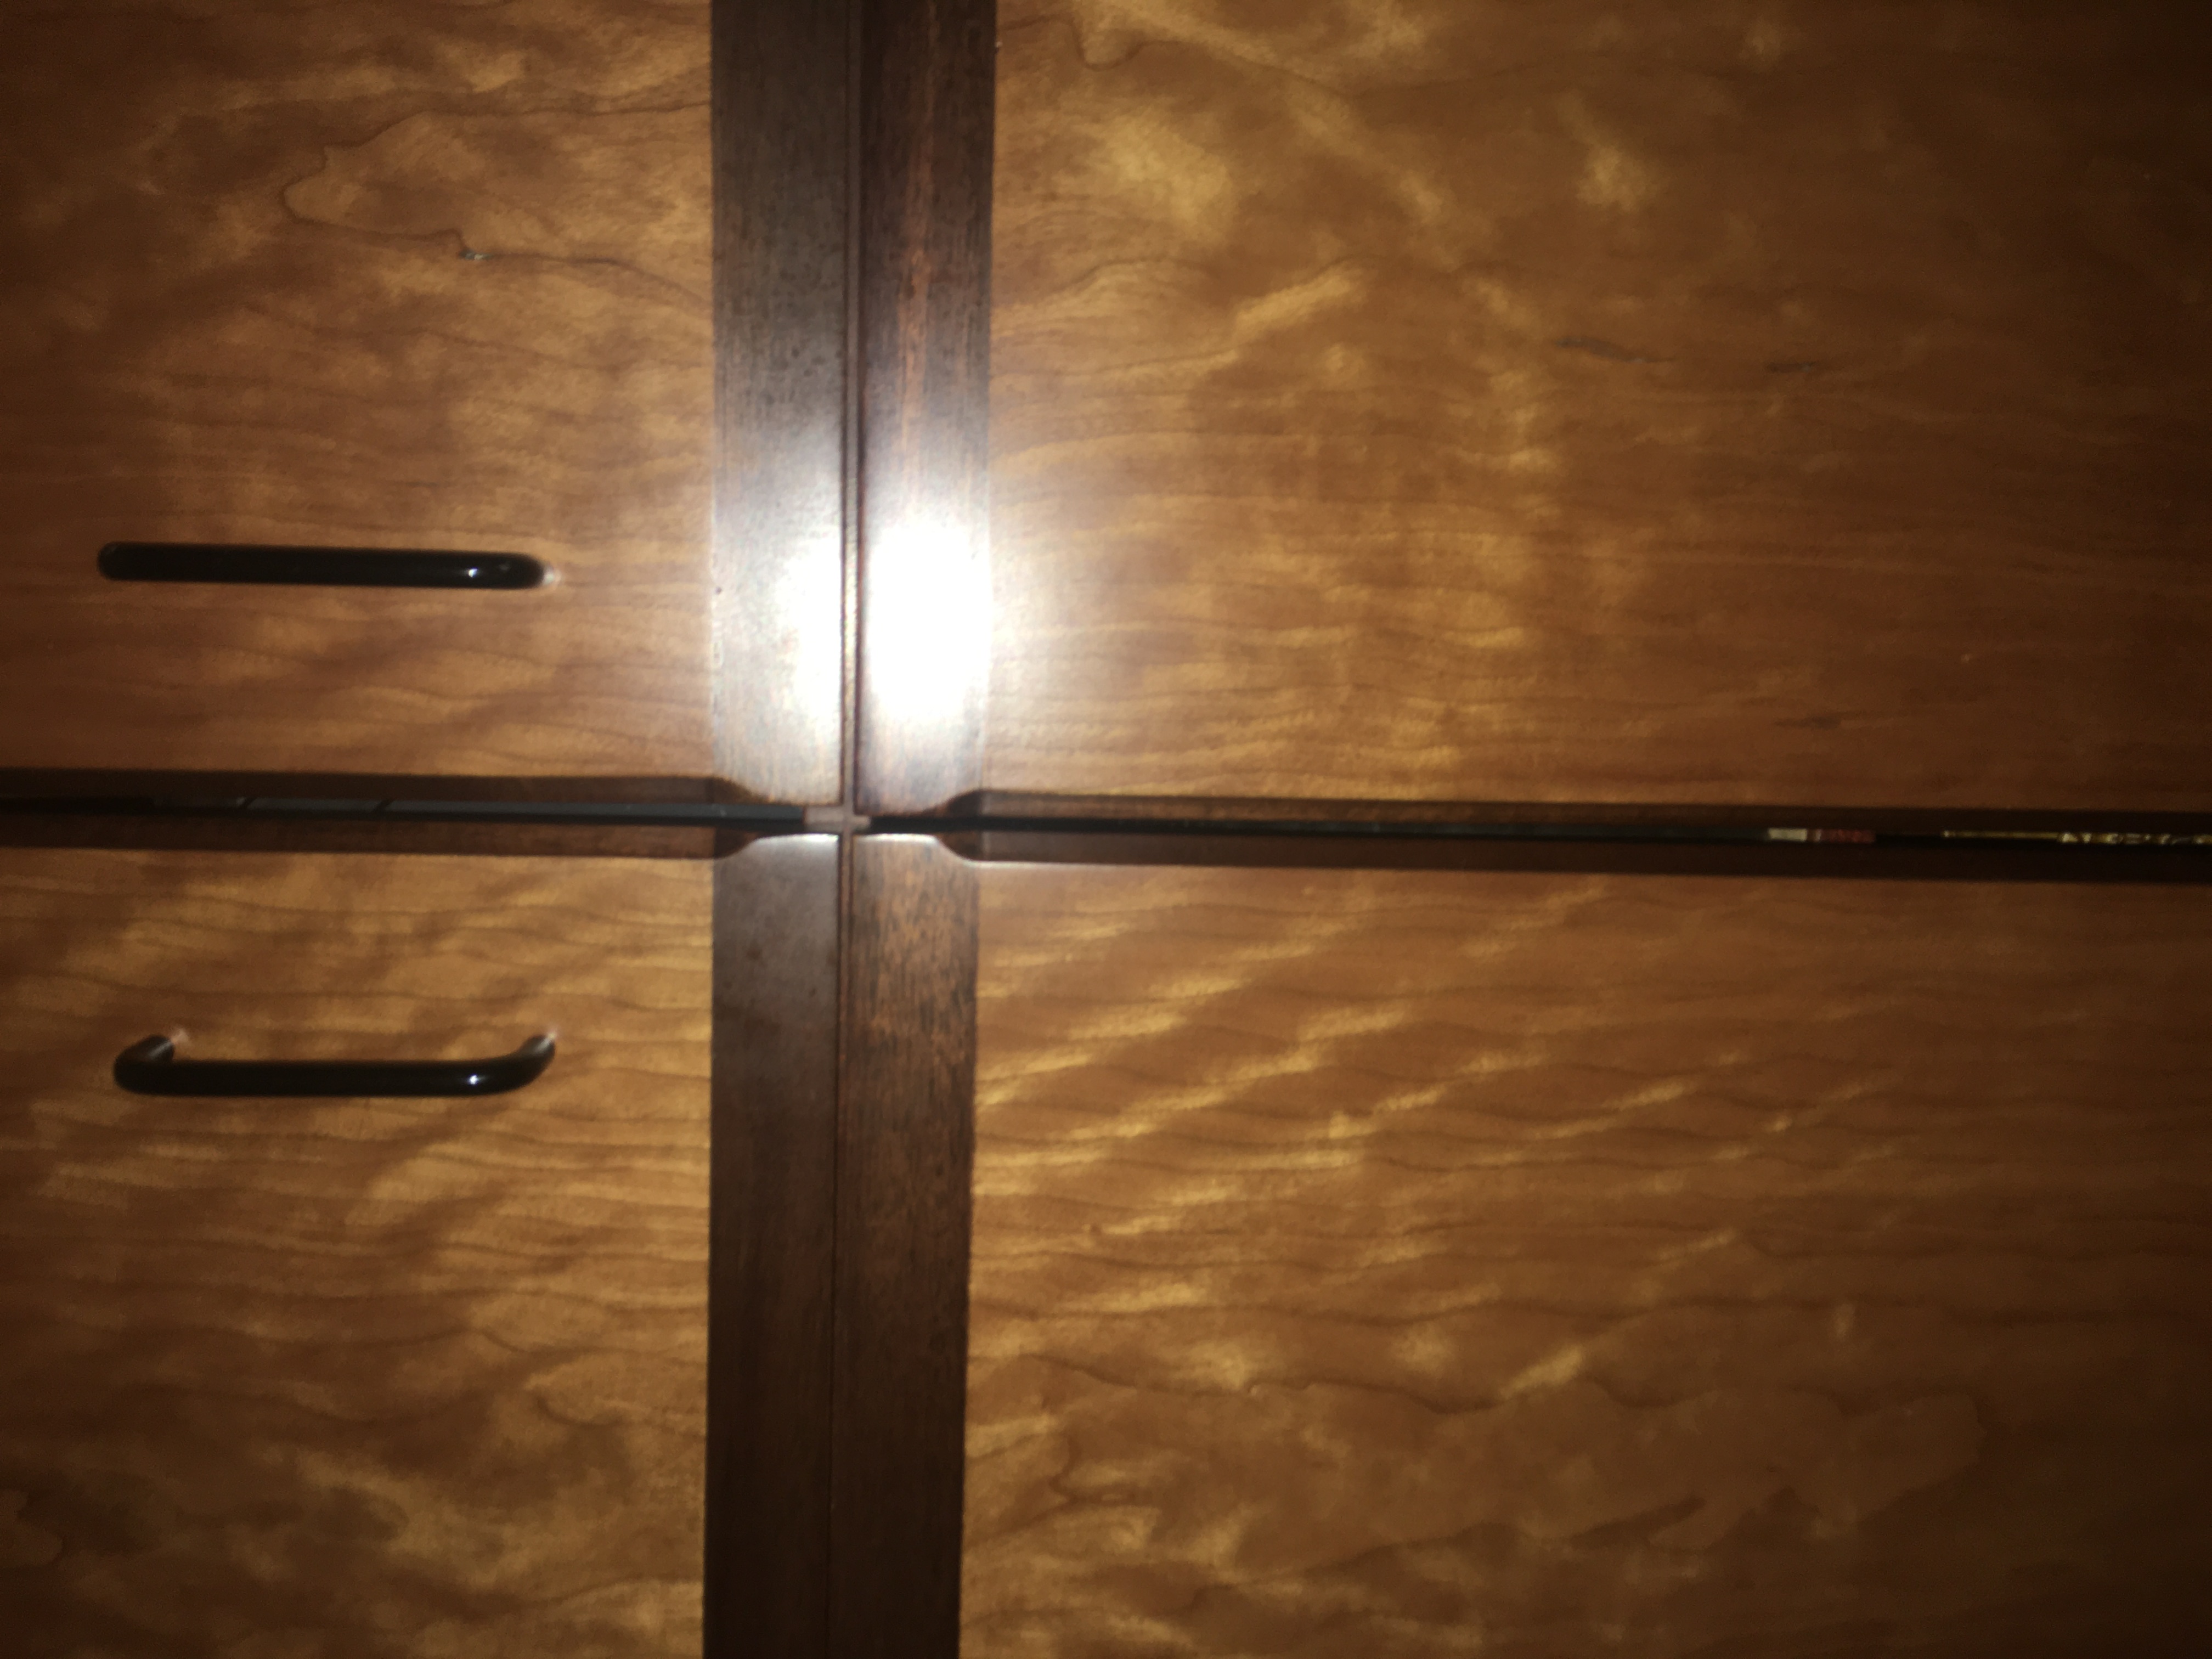
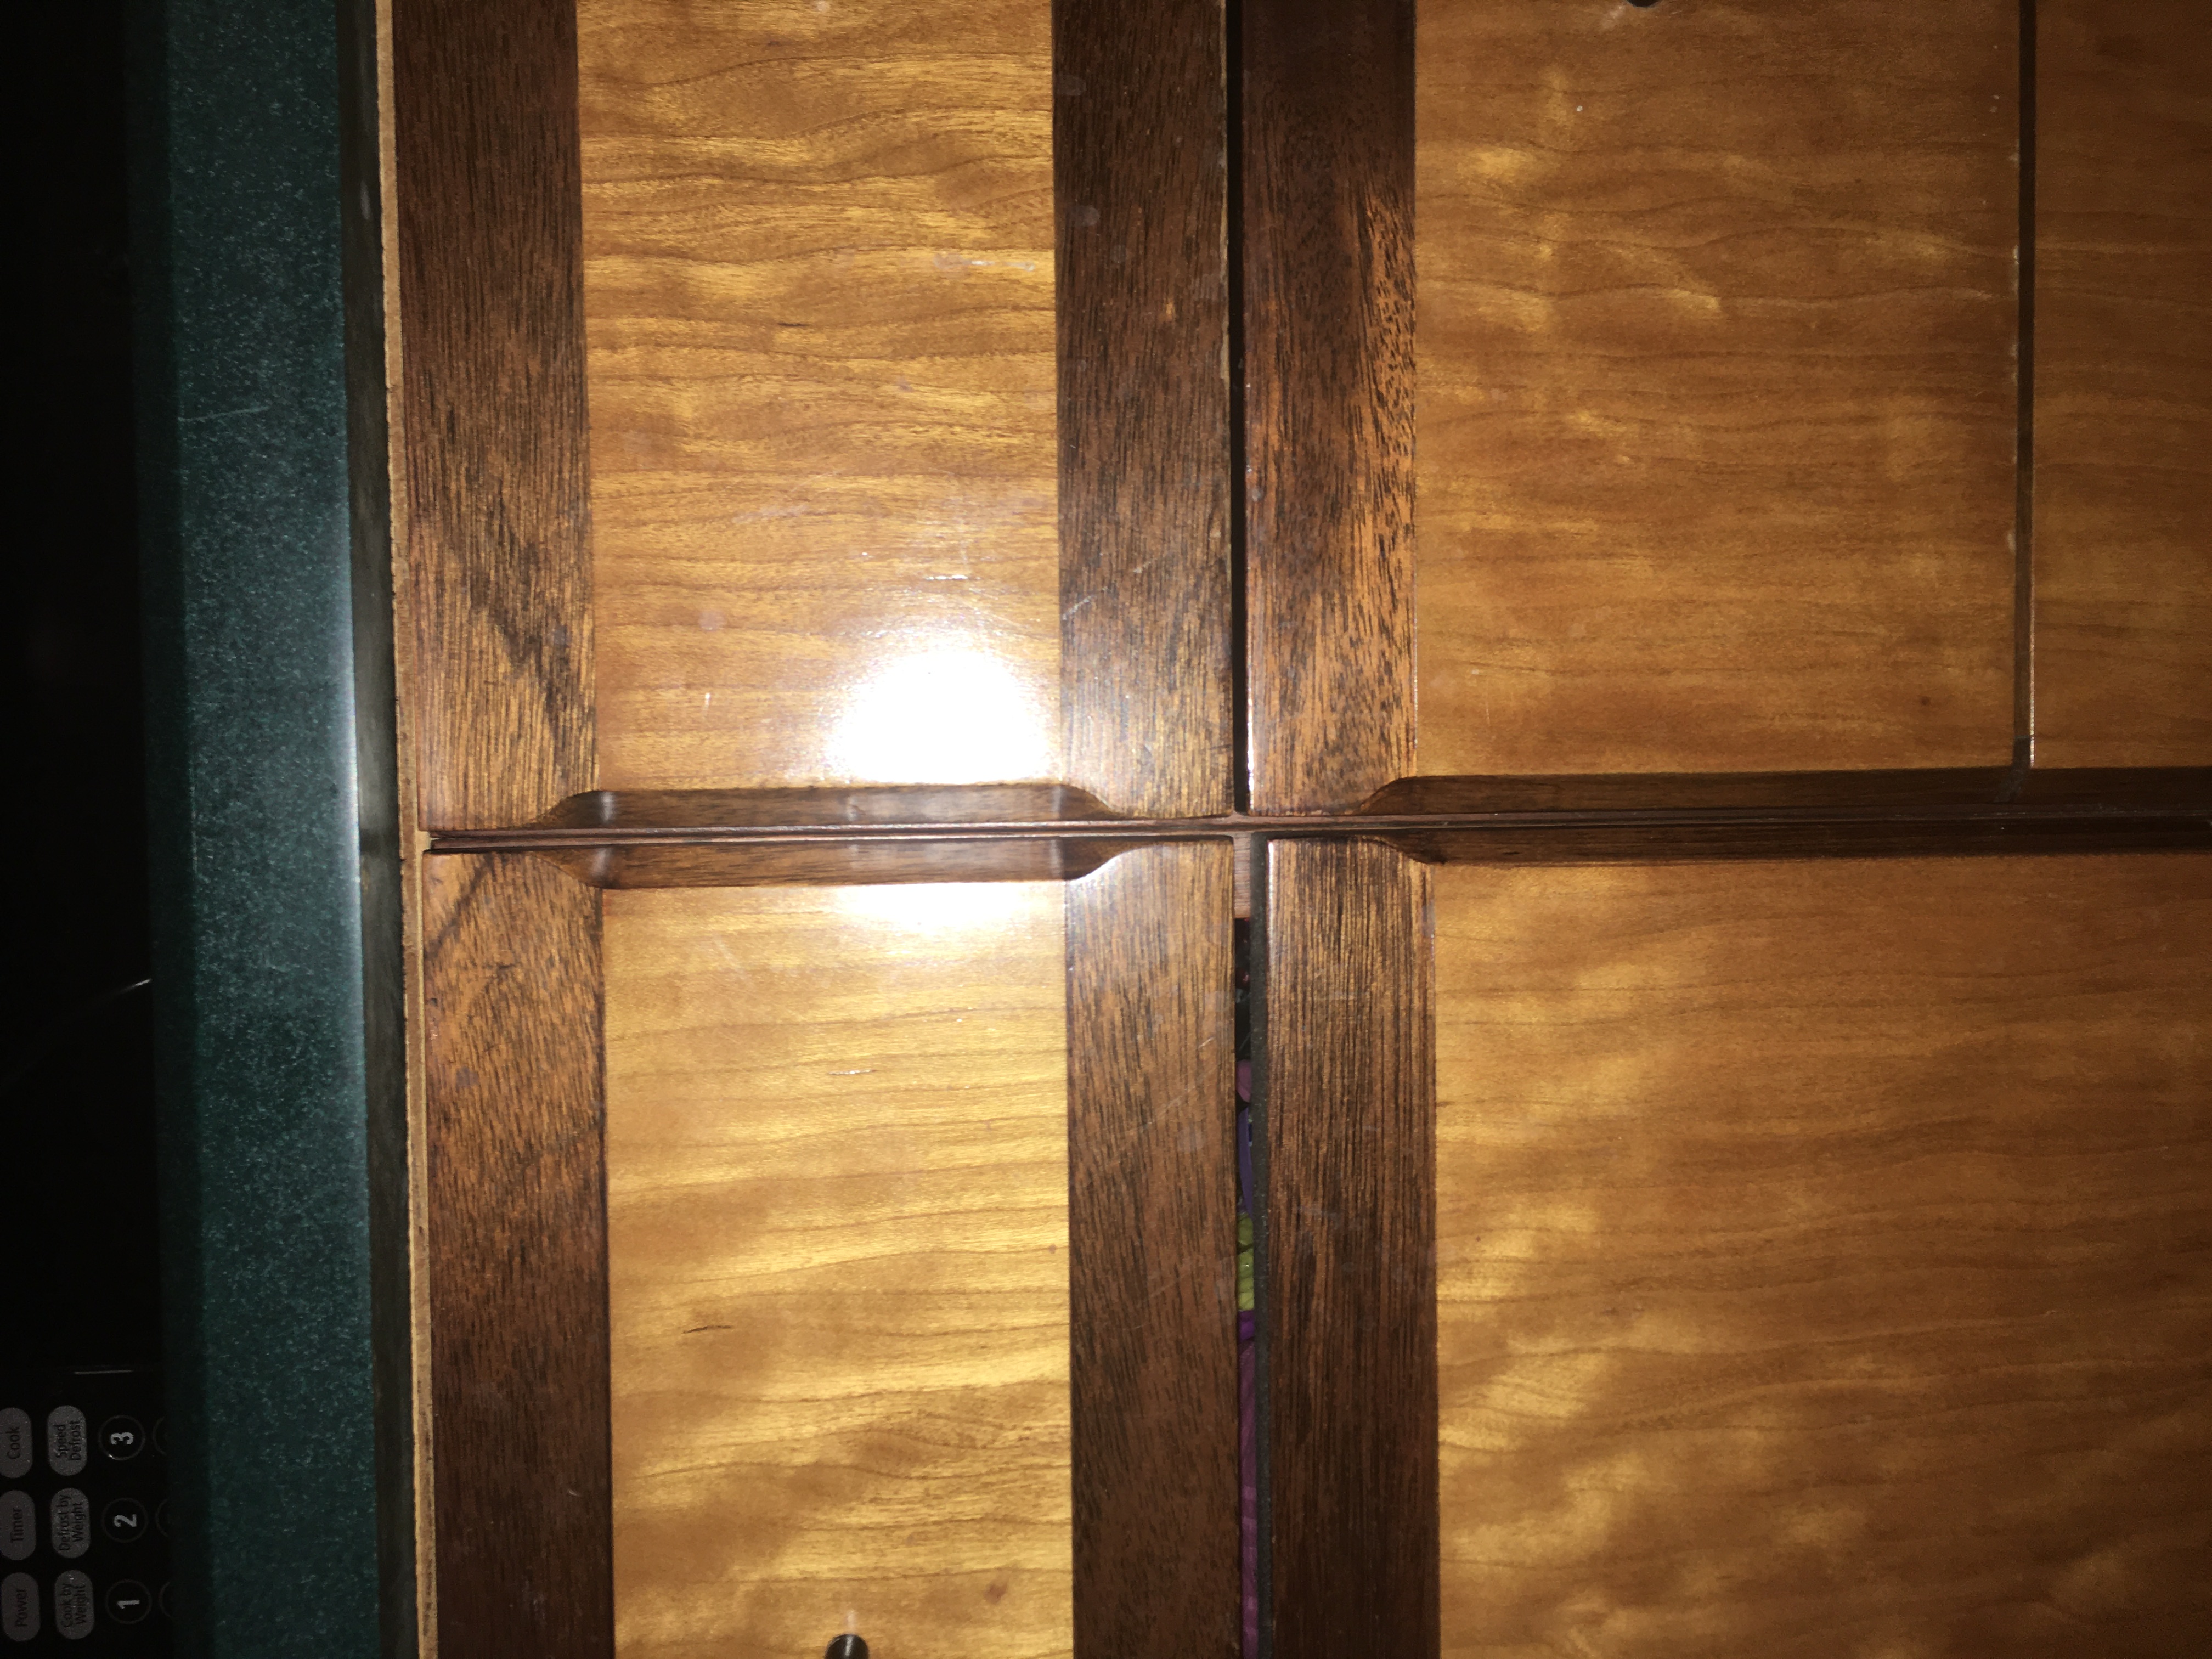
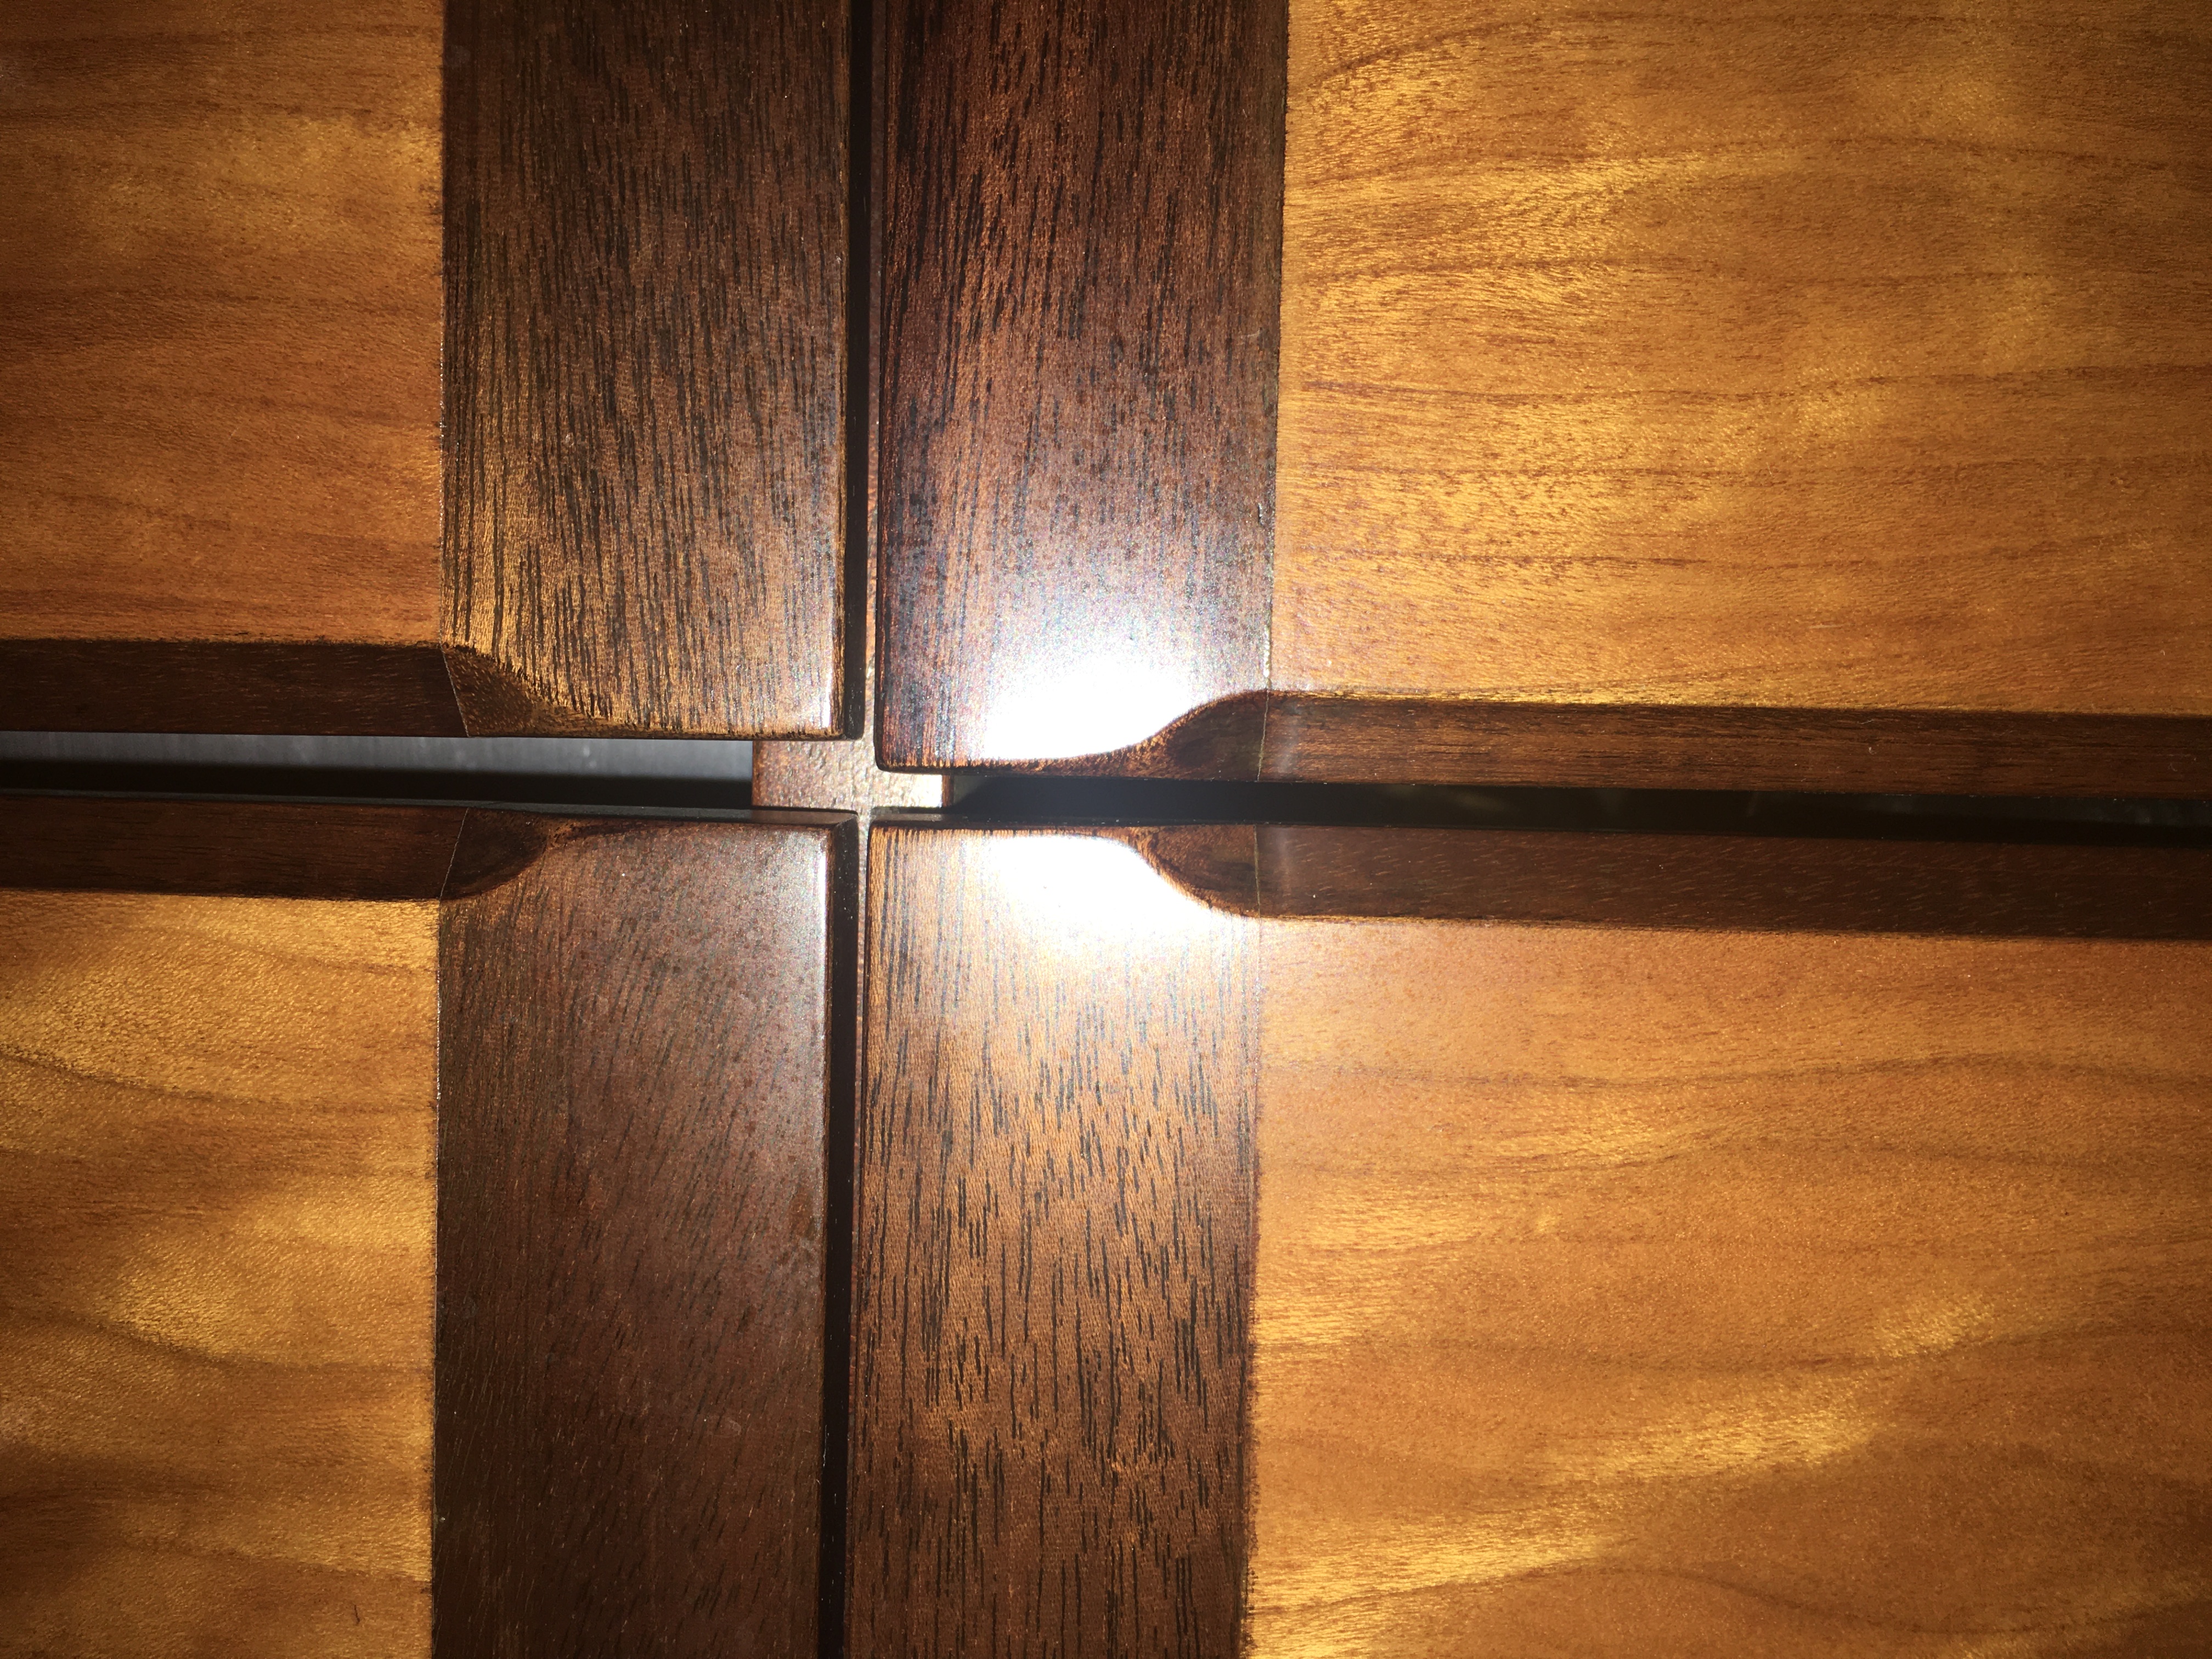
I have a finishing project that has figured cherry veneer field with 1/4" mahogany vertical edges and 1 1/4" Mahogany bands at top and bottom. The mahogany bands and edges are flush with the cherry field. These are new panels intended to match a previous panel finish. The new panels are adjacent to the existing panels.
I believe, first, a sealing wash was applied to the entire panel. This was done to prevent the mahogany stain from bleeding into the cherry. Then an alcohol (mahogany) stain was applied to the mahogany edges and bands, and finally a tint was finally applied to the cherry veneer.
I am not sure what the first wash is called, nor do I know what the cherry stain was called.
None of the stains were oil based.
Is this the proper staining procedure, or is there a better way to achieve this?
1/27/22 #2: Challenging finish ...
Website: niemeyerrestoration.com
Any photos?
1/28/22 #3: Challenging finish ...
Most often a wash coat is thinned shellac. But, an alcohol based dye can melt the shellac.
1/28/22 #4: Challenging finish ...
Yeah really, I'm with Bob.
2/3/22 #6: Challenging finish ...
Your correct...A VERY challenging finish.!!
First thing I do is compare the color of the woods on the old panel to the new ones. This usually requires removing a small area from each wood and then touching up and recoating..
That's easy for me, but could be a problem for others. Your pics offer little help, if they had been taken in indirect sunlight they would have offered a clearer representation of the colorations.
That said, once the colors were determined, you will still be fighting the cherry especially, the natural changing of its color over time and ending up with a future mismatch ....I always let my customer know of this in advance and offered solutions if he wanted to go a different route.!
Sealing the wood first when wanting to use dyes as toners/tints is always smart, but keep in mind that applying dyes over any clear coat act as Filters, just like filters for a camera.!! When you stack filters (spraying a singular color) then sealing it in with clear, and then go back and apply a different second dye color over the first sealed color that is stacking.! The colors do not "blend" together as they would if applying dye stain to the bare wood, where, for instance, the first stain was a little to red so you then apply a greenish stain over it to mute or kill the excess red to a desired degree, be fore any clear is applied.
The result is when layering in between coats of clear, you will end up with the last layer, being the dominate color being reflected.!
Try this yourself using a reddish brown stain, then sealing, then applying a yellowish green dye an revealing in your shop lighting. Then take it out in the direct sunlight ( when dry) and you will see the dominate reflection of the color is the yellow green one.! Looks ok in shop light, but as the light changes, the filtering effect is obvious. So as long as the light is the same in your shop as it is where it finally is viewed is the same it will be acceptable.
But lets say its in a kitchen where not only the dominate artificial light(s) are present, but during the day direct or indirect sunlight is also hitting it, there may well be a customer complaint about it.!
That is why I always used the direct layer on layer application approach all applied to the bare wood so the colors would blend and not create the filter problem.!
Make samples until you get the results you want before even thinking about what route you should go.!!
2/3/22 #7: Challenging finish ...
Mark,
This type of wood/color contrast is not that unusual with tables - dining, conference or desk tops. And some cabinets as well are built and finished with a contrasting band against the main field. These are handsome doors with quality veneers and finish!
Chemmy is right re with checking the colors of the new wood as a first step, especially the cherry. I would wet the raw cherry with acetone or naptha - both quick flash solvents - to sense where you need to go to match the existing cherry panels.
- Make a good sized sample board with the cherry field and mahogany band on all four sides - 18" square might be a good size.
- Prep some laid up cherry and separately some mahogany.
- Develop your cherry finish system.
- Develop your mahogany finish system separately. Note that the mahogany appears to be full filled/closed pore.
1. Tape off the mahogany on your sample board.
2. Begin to apply your cherry color system - perhaps only to a wash coat depending on how many color steps are involved. At this point you are only establishing color for the cherry. You may be ' stacking ' as Chemmy notes, and I would suggest that the clear between the color steps - if any, as you might hit it with 1 color application, which I doubt but who knows? - should all be wash coats so your film isn't too thick.
3. That done, remove the tape from the mahogany, and tape off the abutting cherry.
4. Start your mahogany color system. I would use a grain filler over a thin wash coat or double fill on the raw, perhaps dyed wood to help avoid pinholes. As with the cherry avoid getting too a high of a finish/sealer build.
5. Remove the tape off the cherry and clean off any bleeding from the mahogany work. I typically use vm&p naptha.
6. Lightly scuff all and begin your sealing coats to level and to complete the fill of the mahogany.
7. Do your panels!
This sounds complicated and drawn out, and it really isn't. You just need to do your prep samples first. Used to do stuff like this a lot 'back in the day', though admittedly one color(s) system was more typical than not on multiple wood species - such as plain slice in the field and crotch for the banding. Anyway, I am jealous and have fun!!
2/3/22 #8: Challenging finish ...
By looking at the picture, I'd use cherry and edge the panel with rift sawn walnut. Walnut and mahogany look the same with some age on them. They add some tint to the first coat of clear to orange it up a bit to match the old finish.
2/18/22 #9: Challenging finish ...
I agree with RichC. It's just aged clear coated walnut/cherry with no stain. Build as such, put the first coat of clear on. Compare. To age it, a drop of 844 BU, and a ml of yellow NGR in a gallon of clear for the final coat should do the trick.
2/26/22 #10: Challenging finish ...
Mix your sealer and add alcohol base color toner , i will give you a trick you will thank me for ....... spray your toner on a square piece of 1/8 inch thick clear glass and let it dry , position it on your new unfinished wood then you will see the color as if you actually toned the wood itself , tweak the color and dial it in on another piece of glass , if you get a match rock snd roll
|