What day is this? The 24th? Gak. I apologize, but you'd be proud of me: I was readin.
Based on the recommendations all over WoodWeb, I ordered Bruce Hoadley's _Understanding Wood_ from the library and it arrived today. However, I continued hunting information on the web, which UW now corroborates.
My Biggest Mistake was letting the air in the work area get too hot (the Forest Products Lab Wood Handbook FPLGTR113 recommends storing wood in cooler temps and under a plastic covering after manufacturing).
My second biggest was believing that the Watco Danish oil sealed the wood by virtue of being absorbed. I understood that the product was a mixture of varnish and oil and I assumed that with each new coat, the varnish was built up, leading to a sealing coat.
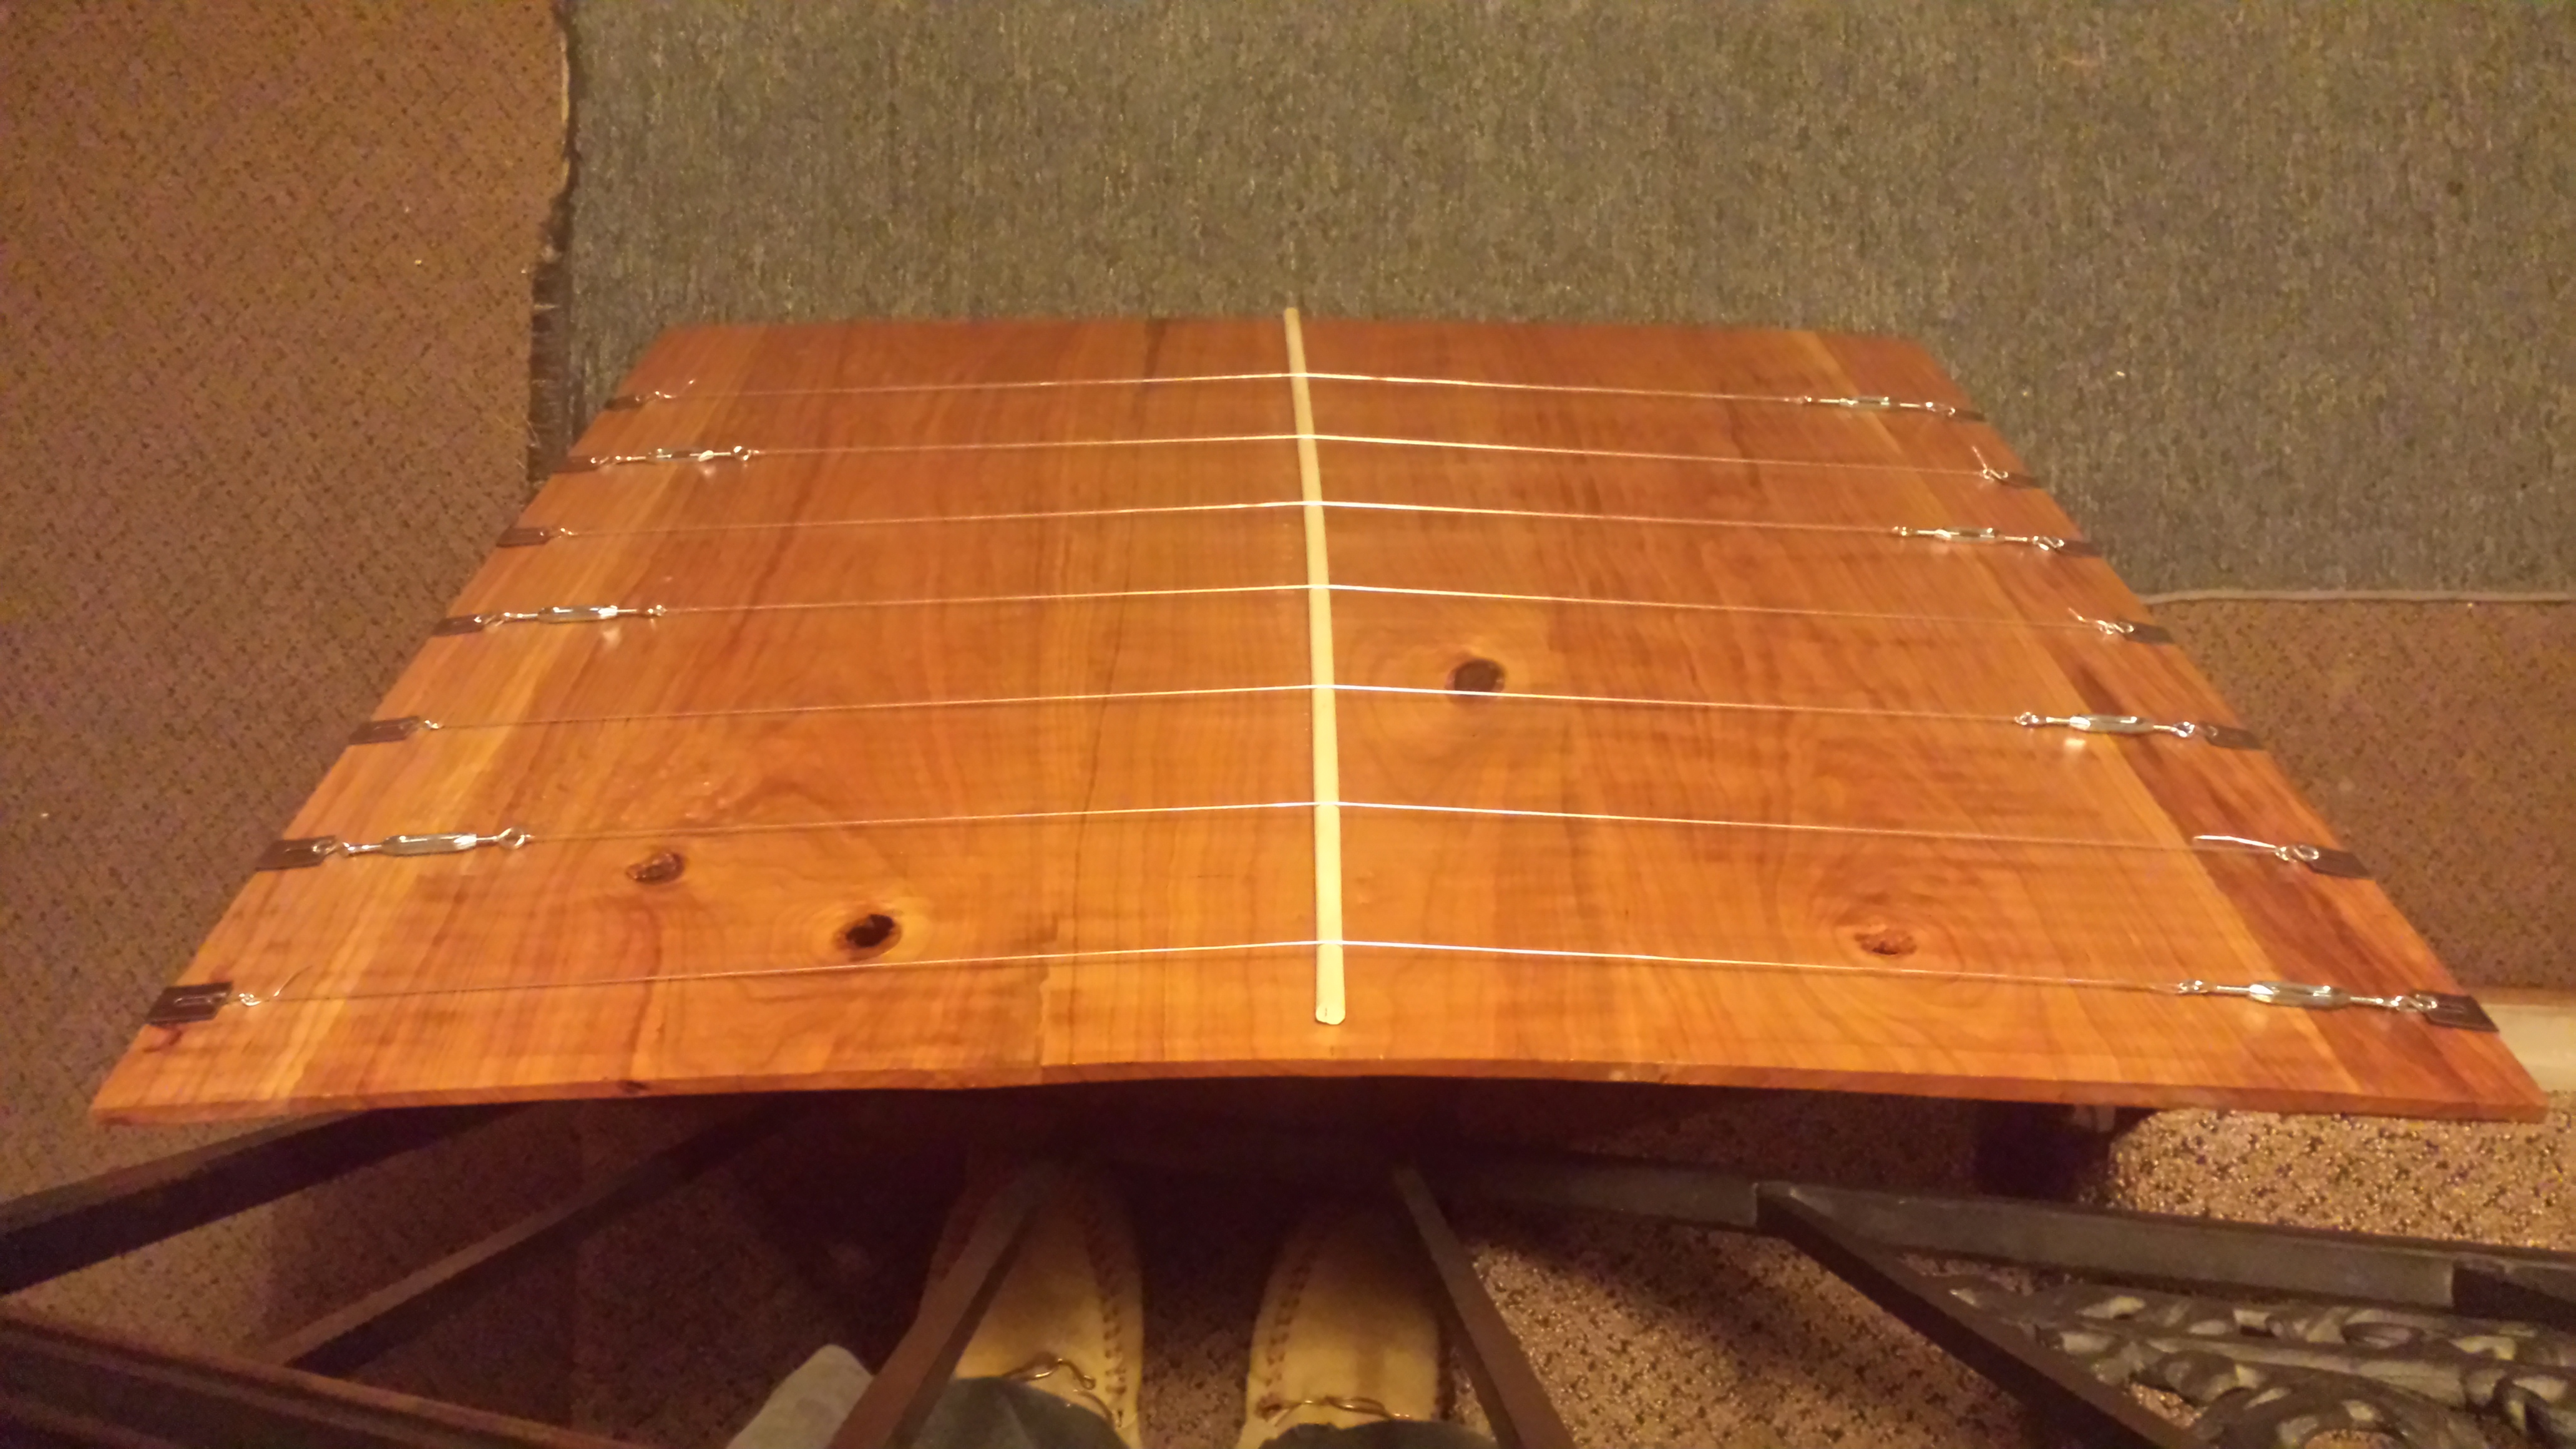
First @Bart, I had that very idea: I made a "spine" out of a 3/4" dowel with a flat side for the center back and stretched cables side-to-side across it. I found stainless steel "mirror hangers" in the hardware store, about an inch wide and in a squared-off J profile, and bought a very scary circular saw for the dremel tool to mill slots in the edges. That bit was dicey because the edge is only 1/4" in places.
I put the hangers in the slots, and attaching a turnbuckle to one side with an S-hook, and the stretched 18-ga galv. wire between the turnbuckle and an S-hook in the hanger on the other side. I was very surprised that there was still enough travel in the buckle to tension it up, even with my clumsy construction.
The wires pluck like a banjo. I've got 8 of them space roughly 4-1/2 inches apart.
I don't know if steel wire is going to be strong enough for cherry... :^) I'll rig some other way to hang it.
@rich c
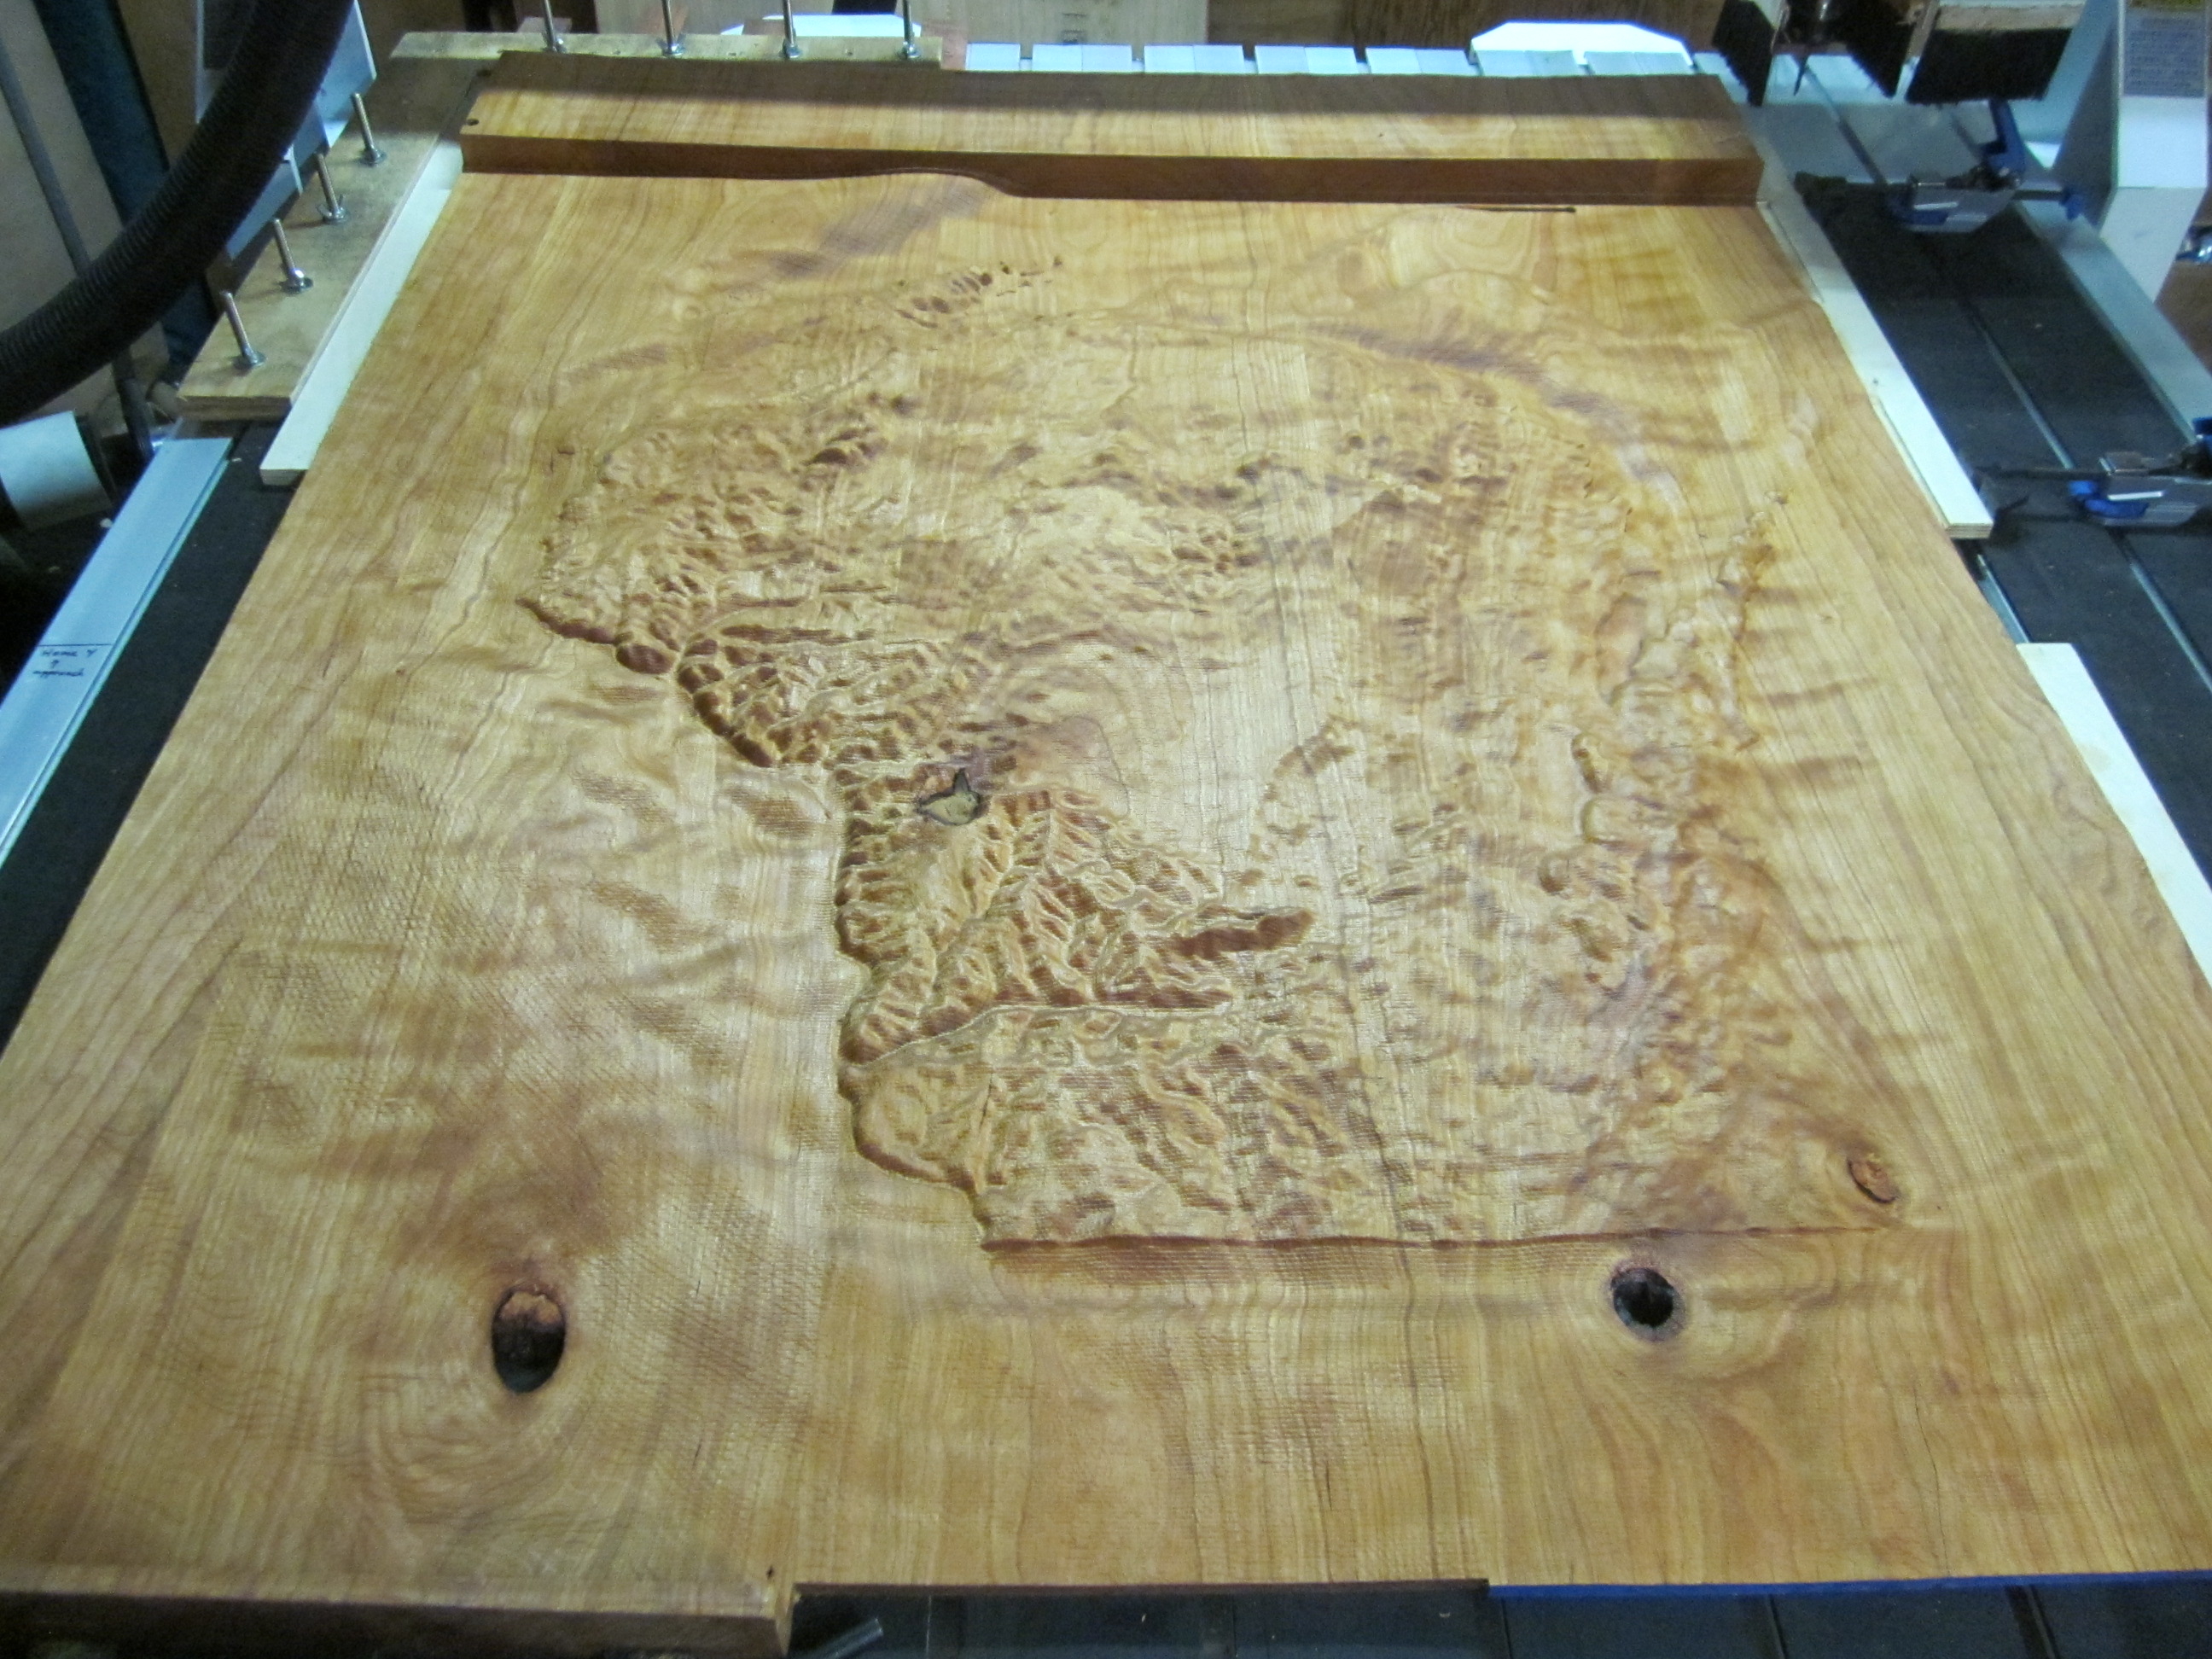
The picture was of what I deem the finish cut. I don't have a good way to sand it, but I scrub every inch of it with stiff brushes. The back side was cut first with a "bowl-cutter" bit, which I discovered doesn't quite have a flat bottom, so it left an interesting pattern of concentric Vs. However, as it was mostly flat, and face-down, it participated less in moisture loss than the face-up side.
I had let the piece rest on the machine's table for several days, but not, as you guessed, raised to allow air movement across the bottom. There had been some cupping even in the pre-cut 8/4 stage.
@Leo G
(middle name Leo here) That's a nice trick to know. I did what you said in a different way. After I got it to lay down again by laying damp towels on the over-dried side (took 5-hours), I put a dowel under it's back and clamped the edges which had earlier cupped flat to the table. I let it dry that way for several days.
As soon as I unclamped it, I was ready with "spar varnish". 2 coats. "If it's good for ships," I assumed, "the only thing more robust would be what they put on submarines." Wrong again. Firstly, FPLGTR113 indicates that a minimum of THREE coats (and 6 or more for real ocean applications) are required to get good finish, but secondly, it recommends 2-part polyurethanes above clear varnish.
Even after unclamping, a cup of perhaps an inch remained. However, I was able to take that out with my "wire braces."
@Gerry
Before I hit on the idea of slots and wires, I was considering over-wide plywood battens (I was calling them strongbacks) with "fingers" to wrap around the edges with enough clearance to allow the panel to grow/shrink. However they would have been visible. The piece is really too thin to trust screwing into--and of course, I'm using a method which is trusting that 1/16" of wood is enough to keep a hanger from tearing out.
@David R Sochar
I blame my poor excuse for a workshop. It would've been my garage but my son insisted in moving the CNC machine, at least, into the basement which is only slightly better.
I got it at a hardwood supply warehouse. I only assumed it was kiln-dried. (Unfortunately, I haven't been back to the place to show the piece and pick the owner's brain.) Just as you say, learning experience. For all the heartache, I wouldn't trade the experience.
@Bill
Your suggestion had occurred to me, and in fact, I found a youtube video where I watched a fellow use a circ saw to make, very crude, relief cuts in ugly twisted lumber pieces, to get it to lay flat, and planed it and finally glued some strips into dados perpendicular to the cuts to put some strength back. My biggest problem with the approach is not being able to lay the piece flat again after I cut off the holding wood.
I actually thought, "Hey, I have the model in the computer: I could cut its negative out of the back and have a model that was a uniformly thick shell." (But then I laid down until that went away.)
@Jim Conklin
Where do you live?? My son has been urging me to keep the faith with this effort, at least until I meet my fan. :^)
Thank you for the encouragement. Today, I confess to investigating "wood alternatives".
@rich c again:
Prior to today's weakness however I had had the thought that if I started with quartersawn stock I'd give myself a head start. I have made friends with a reputable miller about 50 miles away, but I'm going to take this result to him and get his advice.
A carpenter I showed it to suggested treating the entire piece as the (large) panel in a ficticious door and routing stiles and rails to make a stout floating frame for it.
Thank you all and each. I have some residual questions but will try to remember them for a separate post.