Q.
I build a lot of cabinets but I'm pretty green at installations. The thing I am most curious about is scribing the cabinets to the walls.
Forum Responses
I use an angle grinder with grit paper from the welding supply store. It works very well. I can scribe the end of a p-lam counter like butter with my pocketknife (well, almost). It has better control than you might think.
Use whatever method you are most comfortable with safety-wise. If you use portable tools, it's a good idea to clamp your stile down and use both hands on the tool (especially around an electric planer).
Do you know how to scribe the profile of the wall onto the stile with a compass?
Using a compass (scribing tool), you scribe a line onto the cabinet following the profile of the wall or other surface. The trick is to have the cabinet to be scribed plumb and reasonably close to where it will reside. It doesn't matter what the spread of the scribe is or how far the cabinet is away from the wall, but one dictates the other. The easiest sequence is to temporarily place the cabinet plumb and adjust the scribe so that it touches the wall and cabinet at all times, while scribing a mark onto the cabinet.
I install the cabinet first without the wall side stile on. Then, I measure from the end of the top rail to the wall. Next, I transfer that measurement onto the stile. Then, I temporarily attach the stile to the cabinet exactly parallel to where it will go (this means that it will sit on top of the top and bottom rails). Tape usually holds it well enough. Now you're ready to scribe. Take a compass, with a sharp pencil, and set it to the distance between the wall and the pencil mark on the stile. With the pencil side on the stile, slide the compass down the wall. When you're done, you should have a line (straight or wavy) to cut along.
Upper cabinets are still done the old way, because I haven't figured out how to hold them in place an inch away from the wall. Countertops are real easy, as long as you can move them away from the walls--it is 1 inch from the wall to where the cut is made. Paneling is a snap, too--a couple dabs of contact cement will hold it in place while scribing. Be sure to work from right to left so it doesn't pull into your work.
In the shop, I cut 2" scraps of cleat stock and attach them temporarily to the back outside corners of a finished end cabinet directly over the permanent hanging cleat. When I get to the job site, the cabinet just gets hung up as usual, only it will sit proud to the other cabinets the exact width of the cleat. Shim up the bottom so the cabinet is plumb, then use another scrap of cleat stock and a pencil to mark your scribe line. You are removing the exact thickness of the temporary cleat. Take the cabinet down, a couple of strokes of the block plane (I also back rabbet the sides so I only have a 1/4" to deal with), remove the temporary cleats, and rehang the cabinet.
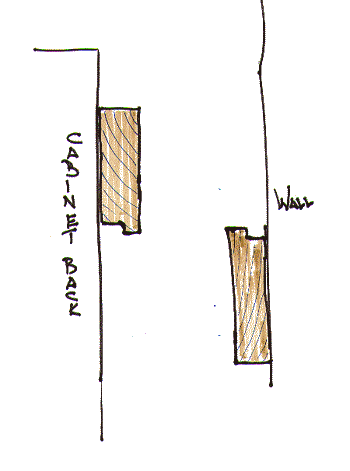
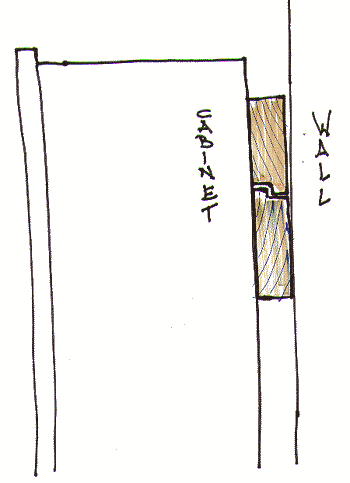
Hanging Rail Sketches thread at the Cabinet & Millwork Installation Forum


The cheap dime store compass works well, but when you finish, put it back at the top as if to do it again to make sure it didn't move. It's better to use a drafting compass. The only disadvantage is that the line gets fatter as you go and you might have to tune it up afterwards.
I scribe with a knife. The knife cuts the tape and you can then pull the cut side off and there is a very clear definition of the cut line. Score once so lightly you only cut the tape. If you push harder, the bevel on the razor knife can grab and cut into or away from where you intended. Then repeat several times, applying the same very light pressure. The knife will follow the cut in the tape and will eventually score the wood. This is also a good technique on pre-finished product. A knife line often appears as a white line on lacquer.
If it is wall paneling, a countertop or a cabinet with a large scribe, I use a jigsaw upside down. After scribing a countertop, I put it on sawhorses, then hold the jigsaw under the countertop, so as I cut, I can only see the blade protruding up at me. All the sawdust gets pulled down and not thrown into my face, and I have an absolutely unobstructed view of the cut line and the angle of the blade.
For a countertop, I might first score the front edge square with a handsaw or knife where it will hit the wall. As I proceed into the cut, I tip the saw, giving me a back bevel that will allow the edge to cut into the plaster tightly where I see it and/or make it easier to fine tune with a small file or rasp by hand. I find power sanders or grinders too aggressive at this point. By cutting upside down, the oscillation of the blade does not tear out the product, even in the most delicate veneer. My jigsaw has several settings for the blade oscillation, which helps clear chips and cut faster. I sometimes deliberately use no oscillation to slow the blade down (slower cutting) for better control on very wavy cuts, as in scribing to a brick wall.
What if you only have 1/2" of scribe and cannot cut upside down with a jigsaw because there is no room? The "down cutting" blades don't work well. First there is the tape that will help prevent chip out. Hopefully you were able to use a knife. Try cutting cross grain (with the jigsaw right side up) on a piece of luan plywood. Horrible chip out? Score it with a knife first and cut a little to the waste side of the line. Better? Set the jigsaw for 0 oscillation. It will take longer but greatly reduce chip out.
In this situation I plan ahead by adding extra width to the piece I am scribing, so that I can tilt the saw so its foot rides on the waste side of the cut. This makes sure the saw's foot does not mar the good side of the cut and at the same time back bevels the cut to make it easier to fine tune and fit tightly to the wall. "But I didn't add extra width to the scribe. How do I keep the saw's foot from marring?" Add more layers of tape to the good side of the cut, but so you can still see the cut line. Then place a shim or thin piece of laminate or plywood between the saw's foot and the work. The saw rides on the shim and the shim absorbs the damage of the foot while spreading the weight over a larger area (that is also protected by low tack tape).
Regardless of what method I use, I would always prefer to cut shy of the line and tune with a (very sharp) low angle block plane, rasp or sanding block, always pushing down towards the work to prevent chip out. With a block plane, try pulling towards you rather than pushing away. I have better control that way. Also, skew the plane iron down towards the work. Not only does it help prevent tear-out, but will allow you to tune fine concave surfaces that would be skipped over holding it straight. By skewing the plane, you actually reduce the angle of the plane iron. Cut a block of wood at a 45 degree angle and place it on the table. Now set a bevel gage at 45 degrees and hold it perpendicular to the cut where it meets the table. 45 degrees, right? Now turn the wood or the gage, keeping it tight to the table and a gap will start to appear. The more you turn it, the bigger the gap. This imitates the angle of attack that the blade has with the wood and the more you skew it, the sharper the "apparent" angle of the blade becomes.
How do you scribe a cabinet that must fit wall to wall? I scribe a strip of plywood to each wall and then connect them with spreaders, creating a mock up of the cabinet where it hits the wall. Be sure to have a diagonal spreader to keep it from becoming a parallelogram. Then either place it on top and trace it or use it as a template with a router and over bearing bit to trim it exactly. You still will want to back bevel it somehow, to ease the fit.