Fitting Frameless Cabinets Between Two Walls
Thoughts on using filler strips to make the transition where frameless cabs fit into openings. September 27, 2009
Question
I'm new to frameless construction (customer request) and unfamiliar with how to handle a vanity cab going in between two walls. Specifically, how do you scribe/deal with the inevitable out-of-plumb walls meeting a square cabinet box? For face frame cabs, I would scribe to fit or use scribe molding (depending on), but I don't see how to deal with this with full-overlay doors and nothing to trim back or attach trim to.
Forum Responses
(Cabinetmaking Forum)
From contributor B:
We use a filler. Build the cabinets smaller than the opening. We allow 1" or 2" overall depending on the situation. Make the filler the same material as the face and wide enough to accommodate out of plumb walls and scribe to fit. Install flush with the front cabinet edge or back 1/16".
From the original questioner:
Thanks. I don't know why I didn't think to use filler. Have you ever attached the filler directly to the side wall ply so that the seam is inside the cabinet behind the door? This is probably anti-production based, but would provide a clean look from the front.
From contributor B:
No, never tried that. We try to keep the filler small enough so that it's not really noticeable.
From contributor J:
Remember minimum fillers are determined by baseboard and door opening conflicts - generally 1" will suffice, but if you have a tall or proud base board or backband around a door casing, this will inhibit door opening.
From the original questioner:
Thanks. The bath is in a track-ish home, so the base is short and thin (will kill into the toekick). The homeowner is also thinking about running tile for the base so it would terminate the same.
From contributor P:
The filler will sit back from the doors/drawers so in the past I have put the filler in and then added pieces of a door rip on top to keep the look.
From contributor H:
I use 1" fillers at wall - easy math, even for me. Lately, though, I've had some with which I had to go to 1 1/2" filler to accommodate a thicker base and cap. As mentioned above, depends on the base or casing really, plus any out of plumb factored in. That alone could account for 1"+. I set mine flush with the face of the cabinet box. Used with a full overlay door the seam is covered, in theory anyway.
From contributor D:
Adding to contributor P's method, you can make the "overlay filler" decorative. Fluting is a common example, or with a molded edge of some sort on top, bottom and sides, etc. You need to use a bigger filler when doing this though. Minimum 3". And leave enough room between it and the door.
From contributor K:
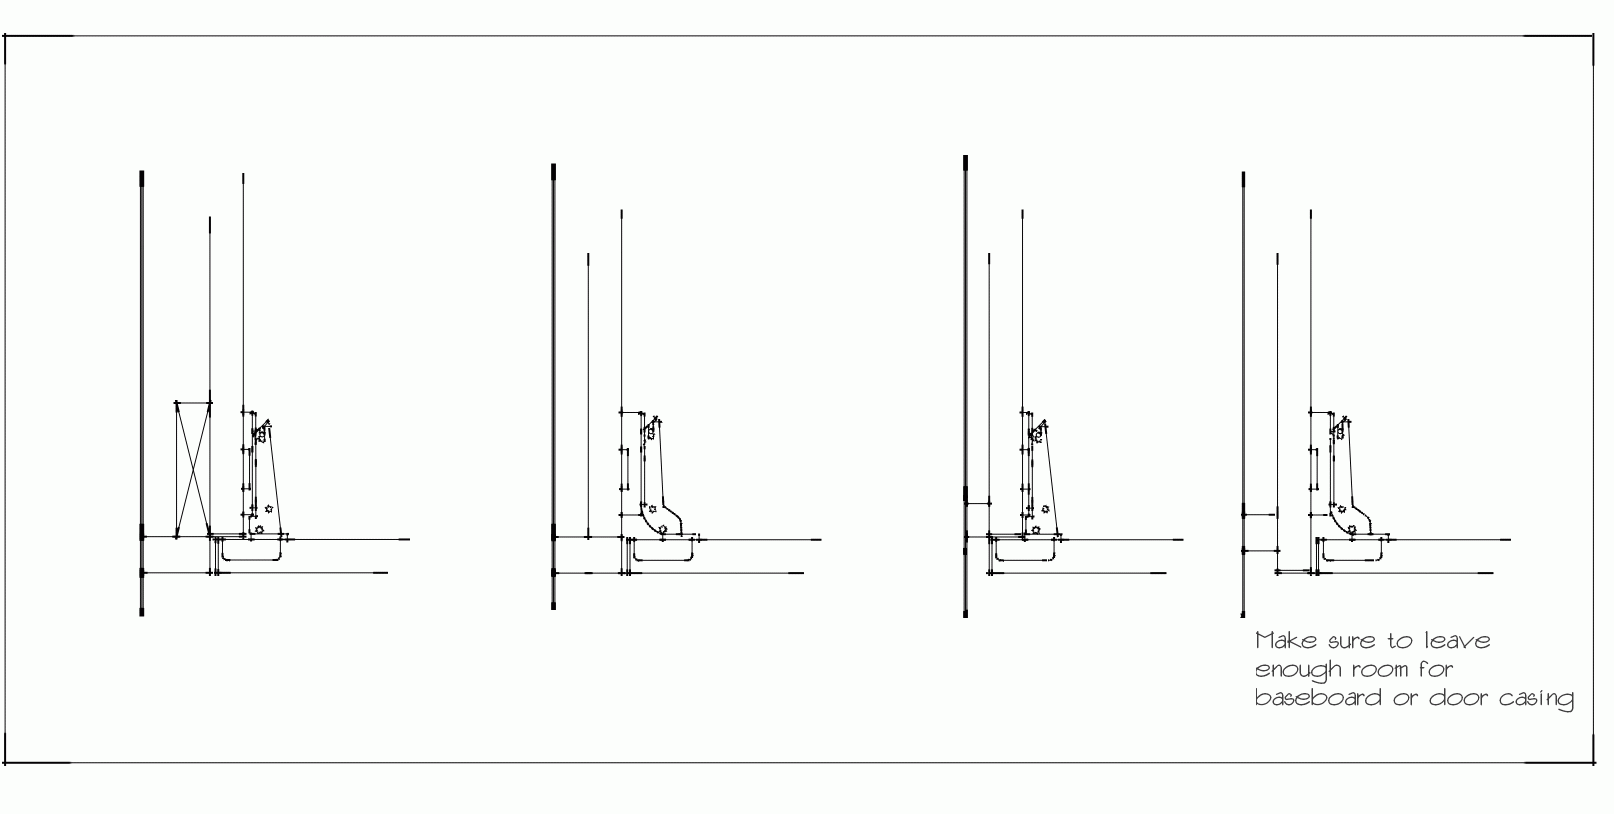
As everyone said (in pictures). These are pretty much all the situations I've encountered.

Click here for higher quality, full size image
From contributor R:
Very nice renderings. We use the one on the left every time with a 1 1/2" filler on the face that is pocket-holed to the return. Always check the molding and casing! There is nothing worse that finding out after the fact that they are using 2" back band on the door casing!
From contributor U:
I like the one on the left as well - it makes a more finished look and you never have to worry about glimpsing any contrast between the edgebanding on the case and the case wall...
From contributor J:
We had a fellow work for us awhile back who used to miter the wall side back at 22.5 and his scribes were always spot on. The newer guys can't grasp that.
From contributor V:
The left two can also be done with Keku connectors. If you use the ones mounted with system screws, 5mm pins in the mounting holes will give you a 12.5mm (1/2") offset for marking your scribe (pins against the box, a bit of 1/2" plywood and pencil up/down the wall). An "L" - with another set of the male portion mounted 37mm from the top - clamped to sawhorses provides a fixture that makes it easy to power/hand plane to the line.
