Question
When you have an exposed end panel, do you generally apply a pre-finished end panel after installation? Isn't it impossible to get a perfectly flush, tight fit?
Forum Responses
You don't state which type of cabinetry you are doing. We do faceless frame cabinetry, and we almost always apply an end panel. You really don't want it flush with the edge of your cabinet - let it hang out over the front edge by 3/8 or so to give it a nice reveal. This also helps protect the doors from impacts.
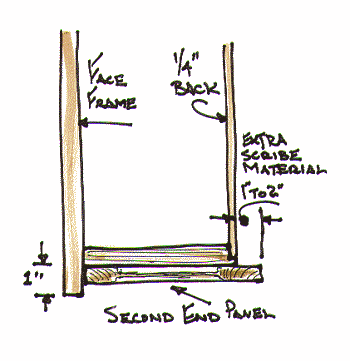
The high-end method I worked with below involved attaching a second full thickness 3/4 inch end panel to the cabinet side. This required that the face frame extend beyond the cabinet side at least an inch (the 1/4 inch reveal is important). This allowed us to use a raised panel on the end of the cabinet, a very classy detail. The scribe panel rails need to be laid out carefully - the side to be scribed had a wider stile (typically 1 to 2 inches), so the stile would be balanced in width after the scribe cut was made.

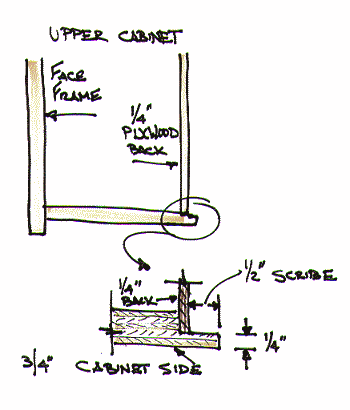
The next method (image below) was based around an extended cabinet side. The rabbet for the 1/4" ply back is extended 1/2", and is scribed to the wall. This worked okay, but the two downsides are when walls are over 1/2" out of plumb (it happens, and there's not enough material to make the scribe cut), and the end panel is veneer, not a raised panel - okay for most kitchens, but not the first class look that a raised panel gives (of course this is a moot point if the cabinets are not raised paneled).

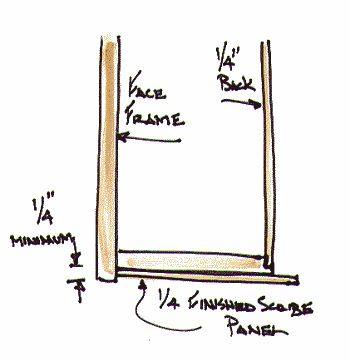
The third method below is to use a 1/4" scribe panel. This works, but I found that sometimes, the face frame reveal was just barely large enough to accommodate the scribe panel, and didn't look quite right (no reveal). Since most of my installs are high end, I haven't done a lot of these, but they seem quick to install.
