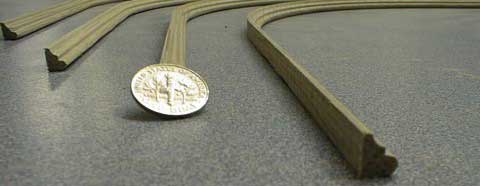
Corner Joints for Rope Molding
Other Versions
Spanish
Cuts won't match up, unless you have left-hand and right-hand versions. May 4, 2005
Question
I normally install 2" to 4 1/4" moulding in smaller starter homes. I am now installing some 6" crown for a family friend. The moulding has rope moulding shipped separately to be installed after the crown is up. How do you get the rope to match on 45 and 90 degree corners? I know there has to be way to cut this, but I'm going crazy trying to make them match.
Forum Responses
(Cabinet and Millwork Installation Forum)
From contributor T:
You can't. Wait, I take that back, you need right hand and left hand twist moulding to match it up. I know someone out there manufactures both. I once ordered a sample door with rope moulding in it and I couldn't for the life of me figure out how they got the rope to line up in the corners. Upon closer inspection, they had right twist rope on the stiles and left twist on the rails. Now *that's* attention to details. If I could remember the door manufacturer's name, I'd say it - they deserve the recognition.
From contributor M:
When I install rope moulding, I will cut one piece, then flip the moulding over and cut the matching end and line them up at the saw before I install the first one. If the moulding is turned over each time, it will line up. After you get the hang of it, you will notice that when you cut it, you will take about the same amount off each time. It will seem impossible, then when you get it, it will speed up.
From contributor T:
Not looking for an argument here, but even if you turn it over, it is still right (or left) hand and won't match exactly. Patterns need to be symmetrical to match - asymmetrical patterns you can only hope to get close.
From contributor P:
If you can use two 22 1/2 degree miters instead of one 45 degree, you can keep the pattern matched. This is the only way besides getting a LH and RH molding.
From contributor E:
It's either Whiter River Mldgs or Bendix Molds in Brooklyn, NY with the right and left twist. You can also go for the bendable rope moulding. It looks very realistic and is available at Constantine's, or call a boat outfitter for a lead on the real stuff, left and right.
From contributor J:
This is not really that big a deal. I just installed rope on about 40 feet of uppers, all with the same twist (which is what you have, I'm assuming). You will never get it to match up perfectly by just cutting it. Cut your first 45 in the valley of one of the ropes. Then do some trial and error on the second cut until it looks presentable. Blend the rope together with some 120 g sandpaper. All my work was done before finish, so this may be a little more time consuming if you have already finished everything. This works good and the joint will never look out of place or be noticeable. Bottom line is - don't sweat it! I had the same worries when I began and even posted on this forum about it, but it all turned out great in the end.
From contributor F:
I agree - try to cut it close, then sand the joint to form them together. You'll get the hang of it after you do a few. No one will ever notice. Usually when I'm dealing with this, it's on pre-finished mouldings. I do the same thing and even sand (sparingly). I have a box of colored magic markers I use to blend them in, which works well.
From contributor H:
With a little pre-planning, you can get most of your corners to look okay at least from seven feet. It can be frustrating. I always cut longer than I think I need. Sanding finished materials I avoid unless the customer complains.
From contributor E:
Use the bendable stuff and screw the miters. It looks and feels very realistic and you can't tell the difference. Constantines.
